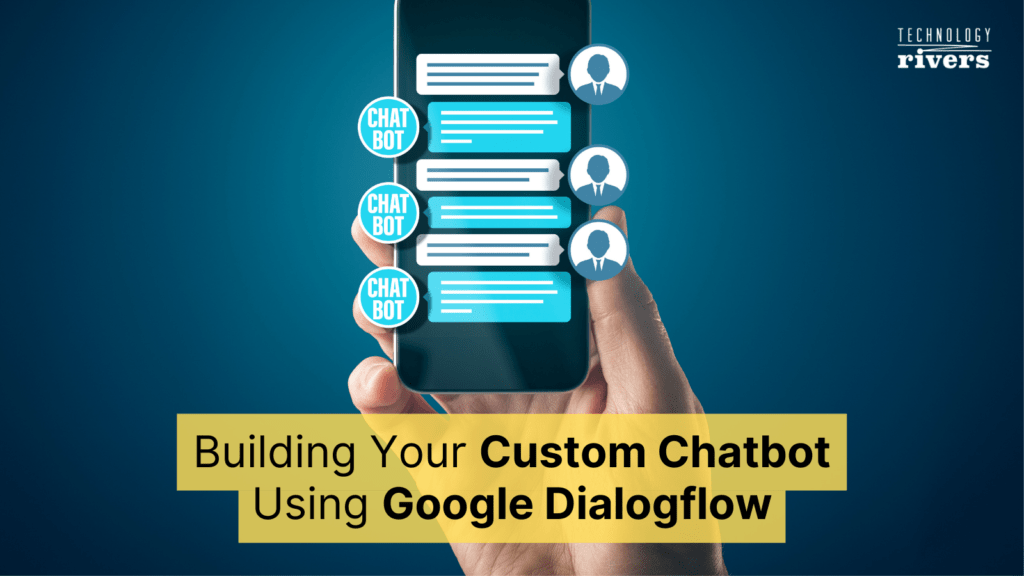
 Blogs » Building Your Custom Chatbot Using Google Dialogflow
Chatbots Redefining Customer Experience
What is a chatbot?
A chatbot is an artificial intelligence (AI) software that can simulate a conversation with a user in natural language through text or voice.How are chatbots used?
Conversational experience plays a critical role in customer experience and support. Chatbots harness this critical element to meet customers’ expectations in a personalized way. Chatbots help in enhancing customer experience through streamlined conversations between people and services. At the same time, they offer companies new opportunities to improve the customers’ engagement process and operational efficiency by reducing the typical cost of customer service. To be a successful business in this day and age, your company’s chatbot solution should be able to effectively perform both of these tasks.Existing chatbot development platforms
There are different approaches and off-the-shelf tools that can be used to develop a chatbot from scratch. Almost every leading tech player out there allows companies and individuals to purchase their Artificial Intelligence development platforms to build chatbots for their usage. To name a few:- Microsoft Bot Framework
- Rasa – Open Source
- Google Dialogflow
- IBM Watson
- Amazon’s Lex
- Pandorabots
- Botpress – Open Source
Google Dialogflow for Chatbots
What is Google Dialogflow?
Google Dialogflow is an end-to-end tool powered by NLP to support rich and contextualized customer conversations. Google Dialogflow provides a web-based development platform, the Dialogflow Console, for building chatbots on top of your products and services, providing a powerful NLU engine to process and understand what your users are looking for. Dialogflow boosts a thriving development community of over 1.5 million users.Some key concepts in Google Dialogflow
Let’s look into an overview of some of the most fundamental concepts used in Google Dialogflow:Agents
A Dialogflow agent is essentially a chatbot that handles and understands conversations with your end-users in natural language. A Dialogflow agent is similar to a human call centre agent, in that it can be trained for handling different types of scenarios.Intent
An intent basically categorizes the specific intents of users who interact with your chatbot. When you create an agent in Dialogflow, two default intents are created:- Default Welcome Intent: Default Welcome Intent will be called when the user starts interacting with your chatbot. Even when the user hasn’t provided any input, this intent will be invoked.
- Default Fallback Intent: Default Fallback Intent is called when the user’s input does not match with any other intent.
Elements of an Intent
Training Phrases
Training phrases are sample phrases for what users might say or write during a conversation turn with the chatbot. When the end-user input resembles one of these phrases, Dialogflow matches the intent.Response
A response means an action or a response that is provisioned by you after a user says something (shows an intent).Action
You can define an action for each intent. When an intent is matched, Dialogflow provides the action to your system, and you can use the action to trigger certain actions defined in your system.Parameters
When Dialogflow maps the user’s phrase to an intent, it will extract the appropriate values in the user phrase. These are called parameters. Each parameter has a name and a type. The diagram below shows the Dialogflow’s process for intent matching and then responding to an end-user:
Source: Google Cloud
Entities
An entity in Dialogflow is anything you want to take an action on. Entities in Dialogflow also help in setting the context in place for contiguous conversations in a session ᠆ so a user doesn’t have to repeat things while chatting with a bot!Webhooks
Webhooks are services that allow your chatbot to create dynamic responses, verify the data that is collected from a user during a conversational turn, and trigger actions on the backend e.g. contact our services, etc.Fulfillment
In Dialogflow, fulfillment is a service, app, feed, conversation, or other logic that can resolve a user request. We can create fulfillments for our chatbot using webhooks.Knowledge
Knowledge connector within Dialogflow complements the defined intents by parsing documents, like FAQs or articles to find questions and responses. Questions are added as training phrases, and answers are added as responses. To configure them, you define one or more knowledge bases, that are nothing but collections of documents.Integration
The Dialogflow integrations provide a user interface for the chatbot, and they call the Dialogflow API. Currently, there are several built-in integrations available with Google Dialogflow to connect your chatbot to other platforms.Context
Dialogflow contexts are literally the same as the natural language context, in that, when someone tells you “I want one of those”, you need context for you to understand what “those” is exactly alluding to. Similarly, for Dialogflow to handle an expression like that from a user, its powerful feature of Contexts allows an agent to effectively control the flow of conversation.Training
Dialogflow uses the data from your intents and their training phrases, entities, and many other pieces of data associated with your agent for building and training the agent models. This model keeps on learning and updating automatically whenever changes are made.
A. Building a Simple Chatbot in Google Dialogflow
Use Case
In this hands-on tutorial, you will be walked through the process of building a customized chatbot for a healthcare facility. This chatbot can handle interactions with the patients for scheduling appointments with a health specialist at the facility. We will then integrate this chatbot with Technology Rivers’ in-house application, Patient Communication Scheduling mobile app. We will utilize Dialogflow’s features to build our chatbot that can provide the following services for the healthcare facility:- Tell the user the hours of operation
- Schedule appointments with specialists for the patients

1. Open Dialogflow Console
We first start off by opening Dialogflow NES Console. Agree to the Terms of Services when you open the console and hit AGREE AND CONTINUE, as shown below.
2. Create an Agent
Once in the console, hit the Create Agent option in the left sidebar menu to create an agent, as shown below: In the window, as shown below, enter your agent’s name as patient-schedule-bot, set your default language as English-en, and set your default time zone closest to your location. Once done, hit the Create button.

3. Edit the Default Welcome Intent
Next, we will edit the response in the Default Welcome Intent. It is recommended that you try to achieve three goals with your greeting message in the Welcome Intent: welcome the user, set the expectations, and let the user take charge of the conversation. We will formulate our agent’s greeting as follows: “Welcome. I can tell you the health facility’s operational hours, or I can set up an appointment for you with one of our specialists. Which one would you like?” For that, let’s click Intents in the left sidebar menu. Click on the Default Welcome Intent, as shown below: Navigate to the Responses section. In the Text response table, delete all the prepopulated responses there. In the Text response table, copy and paste the aforementioned response and hit SAVE.
 Test the updated agent using the simulator in the Dialogflow console, as shown below:
 This is how the process flowchart for the welcome intent looks like up until now:

Supply variations of responses
After composing a new greeting message, we need to create other variations of the same response that Dialogflow can randomly select from. Let’s add the responses given below into the Default Welcome Intent:- “Welcome. I can tell you the health facility’s hours, or I can make an appointment. What can I do for you?”
- “Hello there. I can tell you the health facility’s hours, or I can schedule an appointment for you. How may I help you today?”

Create a new Hours intent
In order to create a new intent:- Click the add intent + button next to Intents in the left sidebar menu.

- Enter Hours in the Intent name field. In the Training phrases section, click Add training phrases.

- Enter the following training phrase, pressing the enter key after the entry: “When are you open?”

- In the Responses section, enter the following response in the Text response table: “We’re open from 9 AM to 6 PM every day. Is there anything else I can do for you?” Then click SAVE.

6. Adding more training phrases to Hours intent
In order to enable our agent to identify similar utterances having the same intention, we will add more training phrases in the Hours intent in addition to “When are you open?” In the Training phrases section, copy and paste each phrase as shown below and hit SAVE. Now let’s test the updated agent using the Dialogflow simulator, as shown below:

7. Editing the Default Fallback Intent
To edit the Default Fallback Intent response, follow the following steps:- Click on the Default Fallback Intent from the Intents in the sidebar menu.
- Navigate to the Responses section.
- Delete all the default responses in the Text response table.
- In the Text response table, copy and paste the following response: “Sorry, did you want to hear our hours, or set up an appointment?” Click SAVE.

8. Create a new Make Appointment intent
Now, we create an intent named Make Appointment. In the Training phrases section of this new intent, we add the following training phrases:- “I need to make an appointment at 3 PM today.”
- “Can I schedule an appointment for 4 PM tomorrow?”
- “Can I set up an appointment for noon on Friday?”

- In the Action and parameters table, verify that the system entities @sys.date and @sys.time have appeared, as shown below.

- In the Text response table, add the following response phrase: “Got it. I have your appointment scheduled on $date at $time. See you soon. Good-bye.” Click SAVE.
9. Acquire parameters through slot-filling
Up till now, the training phrases in the Make Appointment intent include the required time and date information: “3 PM today,” “4 PM tomorrow,” and “noon on Friday.” However, in the real world, user utterances may not always include all the necessary parameters. Let’s add the following training phrases:- “Can you find me a doctor?”
- “I am not feeling well.”
- “I’d like to get a health check-up, I have a headache.”
- “I need to see a doctor today.”
- “I’d like to schedule an appointment for this Thursday.”
 To make the parameters $time and $date the required parameters and provide prompt questions for them:
- Click on the Make Appointment intent.
- In the Action and parameters table, check the REQUIRED boxes for the parameters $time and $date. A column called PROMPTS is created.

- Drag up the row of the $date parameter above the $time parameter. The order in which the parameters are listed in the table determines the order of the prompt questions that would be asked by the chatbot.
- For the $date parameter, click the link Define prompts under the PROMPTS column and add the following prompts:
- “Okay, I can help you with that. What day do you want to come in?”
- “Sure, what day are you coming in?”
- “Okay, what day will work for you?”

-
-
- For the $time parameter, click the link Define prompts and add the following prompts and Click SAVE:
- “And what time works for you?”
- “What time?”
- “Now, what time do you want the appointment?”
- For the $time parameter, click the link Define prompts and add the following prompts and Click SAVE:
-

-
-
-
-
- Test the updated agent using the simulator in the Dialogflow console:
-
-
-

10. Using Webhooks to Earmark Appointments on Google Calendar
Now, in order to schedule appointments for the patients with their specialists, we will use a webhook in Dialogflow that receives the time and date parameters from the Make Appointment intent and creates an event on Google Calendar using an API. For that, we need to do these two things:- Obtain credentials for Google Calendar API
- Create a new calendar for patients’ appointments and configure the code in the webhook
 3. Click SAVE.
4. Click the Fulfillment tab on the navigation bar to go to the fulfillment page.
5. Toggle the inline editor’s button to ENABLED.
3. Click SAVE.
4. Click the Fulfillment tab on the navigation bar to go to the fulfillment page.
5. Toggle the inline editor’s button to ENABLED.
 6. Delete the existing content in the package.json tab of the inline editor.
 7. Copy and paste the JSON content below to the package.json tab of the inline editor:
{
"name": "DialogflowFirebaseWebhook",
"description": "Firebase Webhook dependencies for a Dialogflow agent.",
"version": "0.0.1",
"private": true,
"license": "Apache Version 2.0",
"author": "Google Inc.",
"engines": {
"node": "6"
},
"scripts": {
"lint": "semistandard --fix \"**/*.js\"",
"start": "firebase deploy --only functions",
"deploy": "firebase deploy --only functions"
},
"dependencies": {
"firebase-functions": "^2.0.2",
"firebase-admin": "^5.13.1",
"googleapis": "^27.0.0",
"actions-on-google": "2.2.0",
"dialogflow-fulfillment": "0.5.0"
}
}
8. Delete the existing code in the index.js tab of the inline editor.
 9. Copy and paste the code below to the index.js tab of the inline editor and hit DEPLOY:
/**
* Copyright 2017 Google Inc. All Rights Reserved.
*
* Licensed under the Apache License, Version 2.0 (the "License");
* you may not use this file except in compliance with the License.
* You may obtain a copy of the License at
*
* http://www.apache.org/licenses/LICENSE-2.0
*
* Unless required by applicable law or agreed to in writing, software
* distributed under the License is distributed on an "AS IS" BASIS,
* WITHOUT WARRANTIES OR CONDITIONS OF ANY KIND, either express or implied.
* See the License for the specific language governing permissions and
* limitations under the License.
*/

'use strict';

const functions = require('firebase-functions');
const {google} = require('googleapis');
const {WebhookClient} = require('dialogflow-fulfillment');

// Enter your calendar ID and service account JSON below.
const calendarId = ''; // Example: [email protected]
const serviceAccount = {}; // The JSON object looks like: { "type": "service_account", ... }

// Set up Google Calendar service account credentials
const serviceAccountAuth = new google.auth.JWT({
email: serviceAccount.client_email,
key: serviceAccount.private_key,
scopes: 'https://www.googleapis.com/auth/calendar'
});

const calendar = google.calendar('v3');
process.env.DEBUG = 'dialogflow:*'; // It enables lib debugging statements

const timeZone = 'America/Los_Angeles'; // Change it to your time zone
const timeZoneOffset = '-07:00'; // Change it to your time zone offset

exports.dialogflowFirebaseFulfillment = functions.https.onRequest((request, response) => {
const agent = new WebhookClient({ request, response });

function makeAppointment (agent) {
// Use the Dialogflow's date and time parameters to create Javascript Date instances, 'dateTimeStart' and 'dateTimeEnd',
// which are used to specify the appointment's time.
const appointmentDuration = 1;// Define the length of the appointment to be one hour.
const dateTimeStart = convertParametersDate(agent.parameters.date, agent.parameters.time);
const dateTimeEnd = addHours(dateTimeStart, appointmentDuration);
const appointmentTimeString = getLocaleTimeString(dateTimeStart);
const appointmentDateString = getLocaleDateString(dateTimeStart);
// Check the availability of the time slot and set up an appointment if the time slot is available on the calendar
return createCalendarEvent(dateTimeStart, dateTimeEnd).then(() => {
agent.add(`Got it. I have your appointment scheduled on ${appointmentDateString} at ${appointmentTimeString}. See you soon. Good-bye.`);
}).catch(() => {
agent.add(`Sorry, we're booked on ${appointmentDateString} at ${appointmentTimeString}. Is there anything else I can do for you?`);
});
}
let intentMap = new Map();
intentMap.set('Make Appointment', makeAppointment); // It maps the intent 'Make Appointment' to the function 'makeAppointment()'
agent.handleRequest(intentMap);
});

function createCalendarEvent (dateTimeStart, dateTimeEnd) {
return new Promise((resolve, reject) => {
calendar.events.list({ // List all events in the specified time period
auth: serviceAccountAuth,
calendarId: calendarId,
timeMin: dateTimeStart.toISOString(),
timeMax: dateTimeEnd.toISOString()
}, (err, calendarResponse) => {
// Check if there exists any event on the calendar given the specified the time period
if (err || calendarResponse.data.items.length > 0) {
reject(err || new Error('Requested time conflicts with another appointment'));
} else {
// Create an event for the requested time period
calendar.events.insert({ auth: serviceAccountAuth,
calendarId: calendarId,
resource: {summary: 'Health Appointment',
start: {dateTime: dateTimeStart},
end: {dateTime: dateTimeEnd}}
}, (err, event) => {
err ? reject(err) : resolve(event);
}
);
}
});
});
}

// A helper function that receives Dialogflow's 'date' and 'time' parameters and creates a Date instance.
function convertParametersDate(date, time){
return new Date(Date.parse(date.split('T')[0] + 'T' + time.split('T')[1].split('-')[0] + timeZoneOffset));
}

// A helper function that adds the integer value of 'hoursToAdd' to the Date instance 'dateObj' and returns a new Data instance.
function addHours(dateObj, hoursToAdd){
return new Date(new Date(dateObj).setHours(dateObj.getHours() + hoursToAdd));
}

// A helper function that converts the Date instance 'dateObj' into a string that represents this time in English.
function getLocaleTimeString(dateObj){
return dateObj.toLocaleTimeString('en-US', { hour: 'numeric', hour12: true, timeZone: timeZone });
}

// A helper function that converts the Date instance 'dateObj' into a string that represents this date in English.
function getLocaleDateString(dateObj){
return dateObj.toLocaleDateString('en-US', { weekday: 'long', month: 'long', day: 'numeric', timeZone: timeZone });
}
We now have the intent Make Appointment connected to the function makeAppointment() in the webhook.
Let’s try to understand the code above a little bit. The function makeAppointment(agent){} reads the date and time parameter values from the input object agent via agent.parameters.date and agent.parameters.time. After parsing and formatting the date and time values, the function then calls a custom function createCalendarEvent(), which makes an API call to Google Calendar to create an event on the calendar.
Access Google Calendar API credentials
Next, we need to configure the code to access the Google Calendar API. To obtain credentials for the Google Calendar API, follow these steps:
1.On Dialogflow’s navigation bar, click the settings ⚙ button next to the name of the agent.
 2. In the GOOGLE PROJECT table, click the Project ID link to open the Google Cloud Platform console.
 3. In the Google Cloud Platform console, click the menu button ☰ and select APIs & Services > Library.
4. Click on the Google Calendar API card.
3. In the Google Cloud Platform console, click the menu button ☰ and select APIs & Services > Library.
4. Click on the Google Calendar API card.
 5. Hit ENABLE on the Google Calendar API page.
 6. On the navigation bar, click Credentials.
7. Click Create credentials and select the Service account key item from the dropdown menu.
6. On the navigation bar, click Credentials.
7. Click Create credentials and select the Service account key item from the dropdown menu.
 8. Click the Service account dropdown menu and select the New service account item.
9. In the Service account name input field, enter patients-calendar.
8. Click the Service account dropdown menu and select the New service account item.
9. In the Service account name input field, enter patients-calendar.
 10. For the Role field, select Project > Owner from the dropdown menu.
11. Click Create. (A JSON file that contains your service account key is downloaded.)
Create a new Google calendar for the appointments
Next, we need to create a new calendar for the healthcare facility to track patients’ appointments with the specialists. Additionally, we will use the information from the downloaded JSON file to integrate the agent’s webhook code with the new Google calendar.
1. First let’s make a new Google calendar named patients-calendar as prescribed in the Google Calendar guide
2. Once you get to the Share with specific people section while creating it, click ADD PEOPLE. The Share with specific people pop-up window appears after that.
10. For the Role field, select Project > Owner from the dropdown menu.
11. Click Create. (A JSON file that contains your service account key is downloaded.)
Create a new Google calendar for the appointments
Next, we need to create a new calendar for the healthcare facility to track patients’ appointments with the specialists. Additionally, we will use the information from the downloaded JSON file to integrate the agent’s webhook code with the new Google calendar.
1. First let’s make a new Google calendar named patients-calendar as prescribed in the Google Calendar guide
2. Once you get to the Share with specific people section while creating it, click ADD PEOPLE. The Share with specific people pop-up window appears after that.
 3. Open the previously downloaded JSON file and copy the email address specified in the client_email field, without quotation marks.
4. In the Share with specific people pop-up window, paste the email address from client_email in the Add email or name input field:
3. Open the previously downloaded JSON file and copy the email address specified in the client_email field, without quotation marks.
4. In the Share with specific people pop-up window, paste the email address from client_email in the Add email or name input field:
 5. In the Permissions dropdown menu, select the Make changes to events item.
6. Click SEND.
7. Scroll down the Integrate calendar section and copy the content of Calendar ID.
8. In the Dialogflow console, go to your agent’s Fulfillment page.
9. In the index.js tab of the inline editor, find the variable calendarId:
5. In the Permissions dropdown menu, select the Make changes to events item.
6. Click SEND.
7. Scroll down the Integrate calendar section and copy the content of Calendar ID.
8. In the Dialogflow console, go to your agent’s Fulfillment page.
9. In the index.js tab of the inline editor, find the variable calendarId:
const calendarId = '';10. Paste the content of Calendar ID to replace 11. In the index.js tab of the inline editor, find the variable serviceAccount:
const serviceAccount = {};
12. Revisit the previously downloaded JSON file and copy the entire content, including the outermost curly brackets ({}).
13. Paste the content to replace the value of serviceAccount.
14. Click DEPLOY.
15. Test the updated agent to verify that the new appointments are correctly created and scheduled on the patients-calendar:
 This culminates our tutorial on developing a healthcare facility chatbot from scratch using Google Dialogflow. Our chatbot can answer queries pertaining to the facility’s business hours and schedule appointments for specialists directly on Google Calendar.

B. Integrating your Chatbot with your custom mobile app
Now, we will test our newly developed health facility chatbot using the Integrations feature in Dialogflow.- To enable the integration of your chatbot with your custom application, click Integrations in the left sidebar menu on the Dialogflow console. Enable the Web Demo integration, as shown below:

- Once enabled, a window (as shown below) provides the following:
- A link to the chatbot’s own page where the integration is being hosted.
- A link to agent settings, which can be used to customize some aspects of the web page.
- An iframe to embed your agent into your web application.

-
- Running the agent on its own page yields the following interface. You can notice how the dialogue flows between a user and our developed chatbot in the snapshots shown below:


- Using the iframe embed code generated for our chatbot through the web demo option, we incorporate it into our Patient Scheduling App to yield the following results:


Wrap up
In this tutorial, we learned how to build, integrate and test out our custom-made chatbot for a healthcare appointment scheduling application. In the coming days, we plan to write about other Chatbot development platforms shared in this article. We used Google Dialogflow to develop our chatbot for a healthcare facility where users can inquire about its business hours and schedule an appointment with a health specialist. Google Dialogflow, powered by Google AI, provides an easy-to-use development platform that allows brisk deployment of simple to highly complex chatbots for enterprises to readily embed into their custom web and mobile applications. If you have an existing app or planning to build an app, we can help you set up a chatbot using Google Dialogflow. Contact us for a free consultation! We can brainstorm how we will take your product to the next level. Do you have comments or suggestions? Feel free to engage with us through or social media channels. Click here to go to our Facebook and LinkedIn pages.References: Building a Chatbot with Dialogflow Natural Language Processing 101 Building a Chatbot with Dialogflow and Google Cloud Dialogflow Tutorial Dialogflow CX Agent Create FAQ Chatbot with Dialogflow Deconstructing Chatbots